


Use Nexus in Pipelines
Nexus is a repository manager that stores, organizes, and distributes artifacts. With Nexus, developers can have better control over the artifacts needed in a development process.
This tutorial demonstrates how to use Nexus in pipelines on KubeSphere.
Prerequisites
- You need to enable the KubeSphere DevOps System.
- You need to prepare a Nexus instance.
- You need to have a GitHub account.
- You need to create a workspace, a DevOps project (for example,
demo-devops), and a user (for example,project-regular). This account needs to be invited into the DevOps project with the role ofoperator. For more information, see Create Workspaces, Projects, Users and Roles.
Hands-on Lab
Step 1: Get a Repository URL on Nexus
-
Log in to the Nexus console as
adminand click on the top navigation bar.
 -
Go to the Repositories page and you can see that Nexus provides three types of repository.
proxy: the proxy for a remote repository to download and store resources on Nexus as cache.hosted: the repository storing artifacts on Nexus.group: a group of configured Nexus repositories.
-
You can click a repository to view its details. For example, click maven-public to go to its details page, and you can see its URL.
Step 2: Modify pom.xml in your GitHub repository
-
Log in to GitHub. Fork the example repository to your own GitHub account.
-
In your own GitHub repository of learn-pipeline-java, click the file
pom.xmlin the root directory. -
Click
 to modify the code segment of
 <distributionManagement>in the file. Set the<id>and use the URLs of your own Nexus repositories.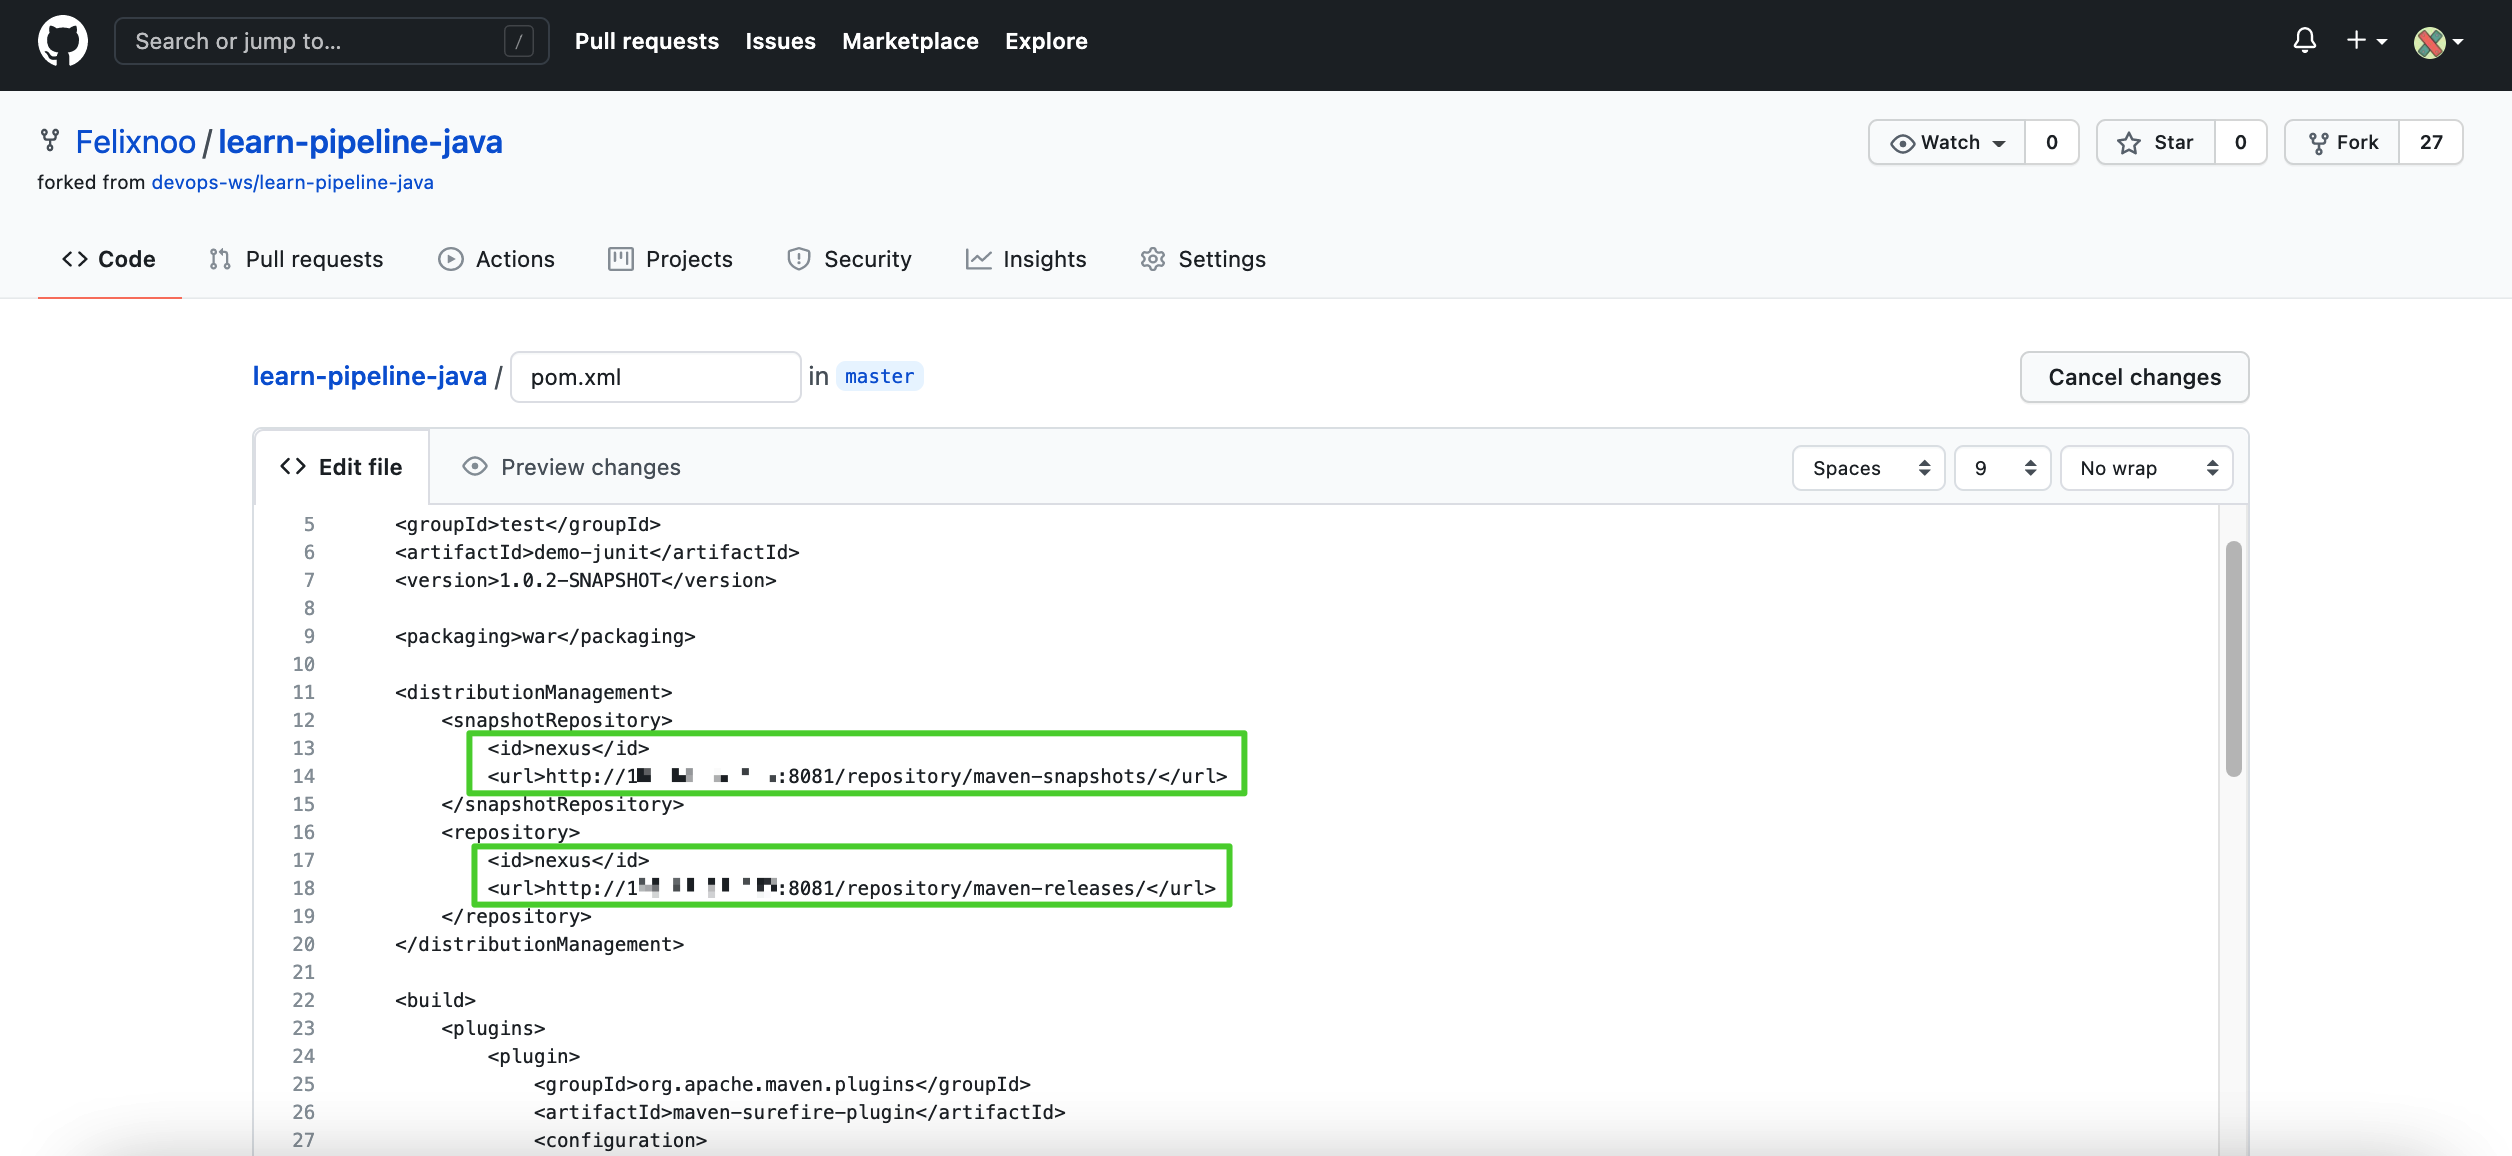
-
When you finish, click Commit changes at the bottom of the page.
Step 3: Modify the ConfigMap
-
Log in to the KubeSphere web console as
admin, click Platform in the upper-left corner, and select Cluster Management. -
Select ConfigMaps under Configuration. On the ConfigMaps page, select
kubesphere-devops-workerfrom the drop-down list and clickks-devops-agent. -
On the details page, click Edit YAML from the More drop-down menu.
-
In the displayed dialog box, scroll down, find the code segment of
<servers>, and enter the following code:<servers> <server> <id>nexus</id> <username>admin</username> <password>admin</password> </server> </servers>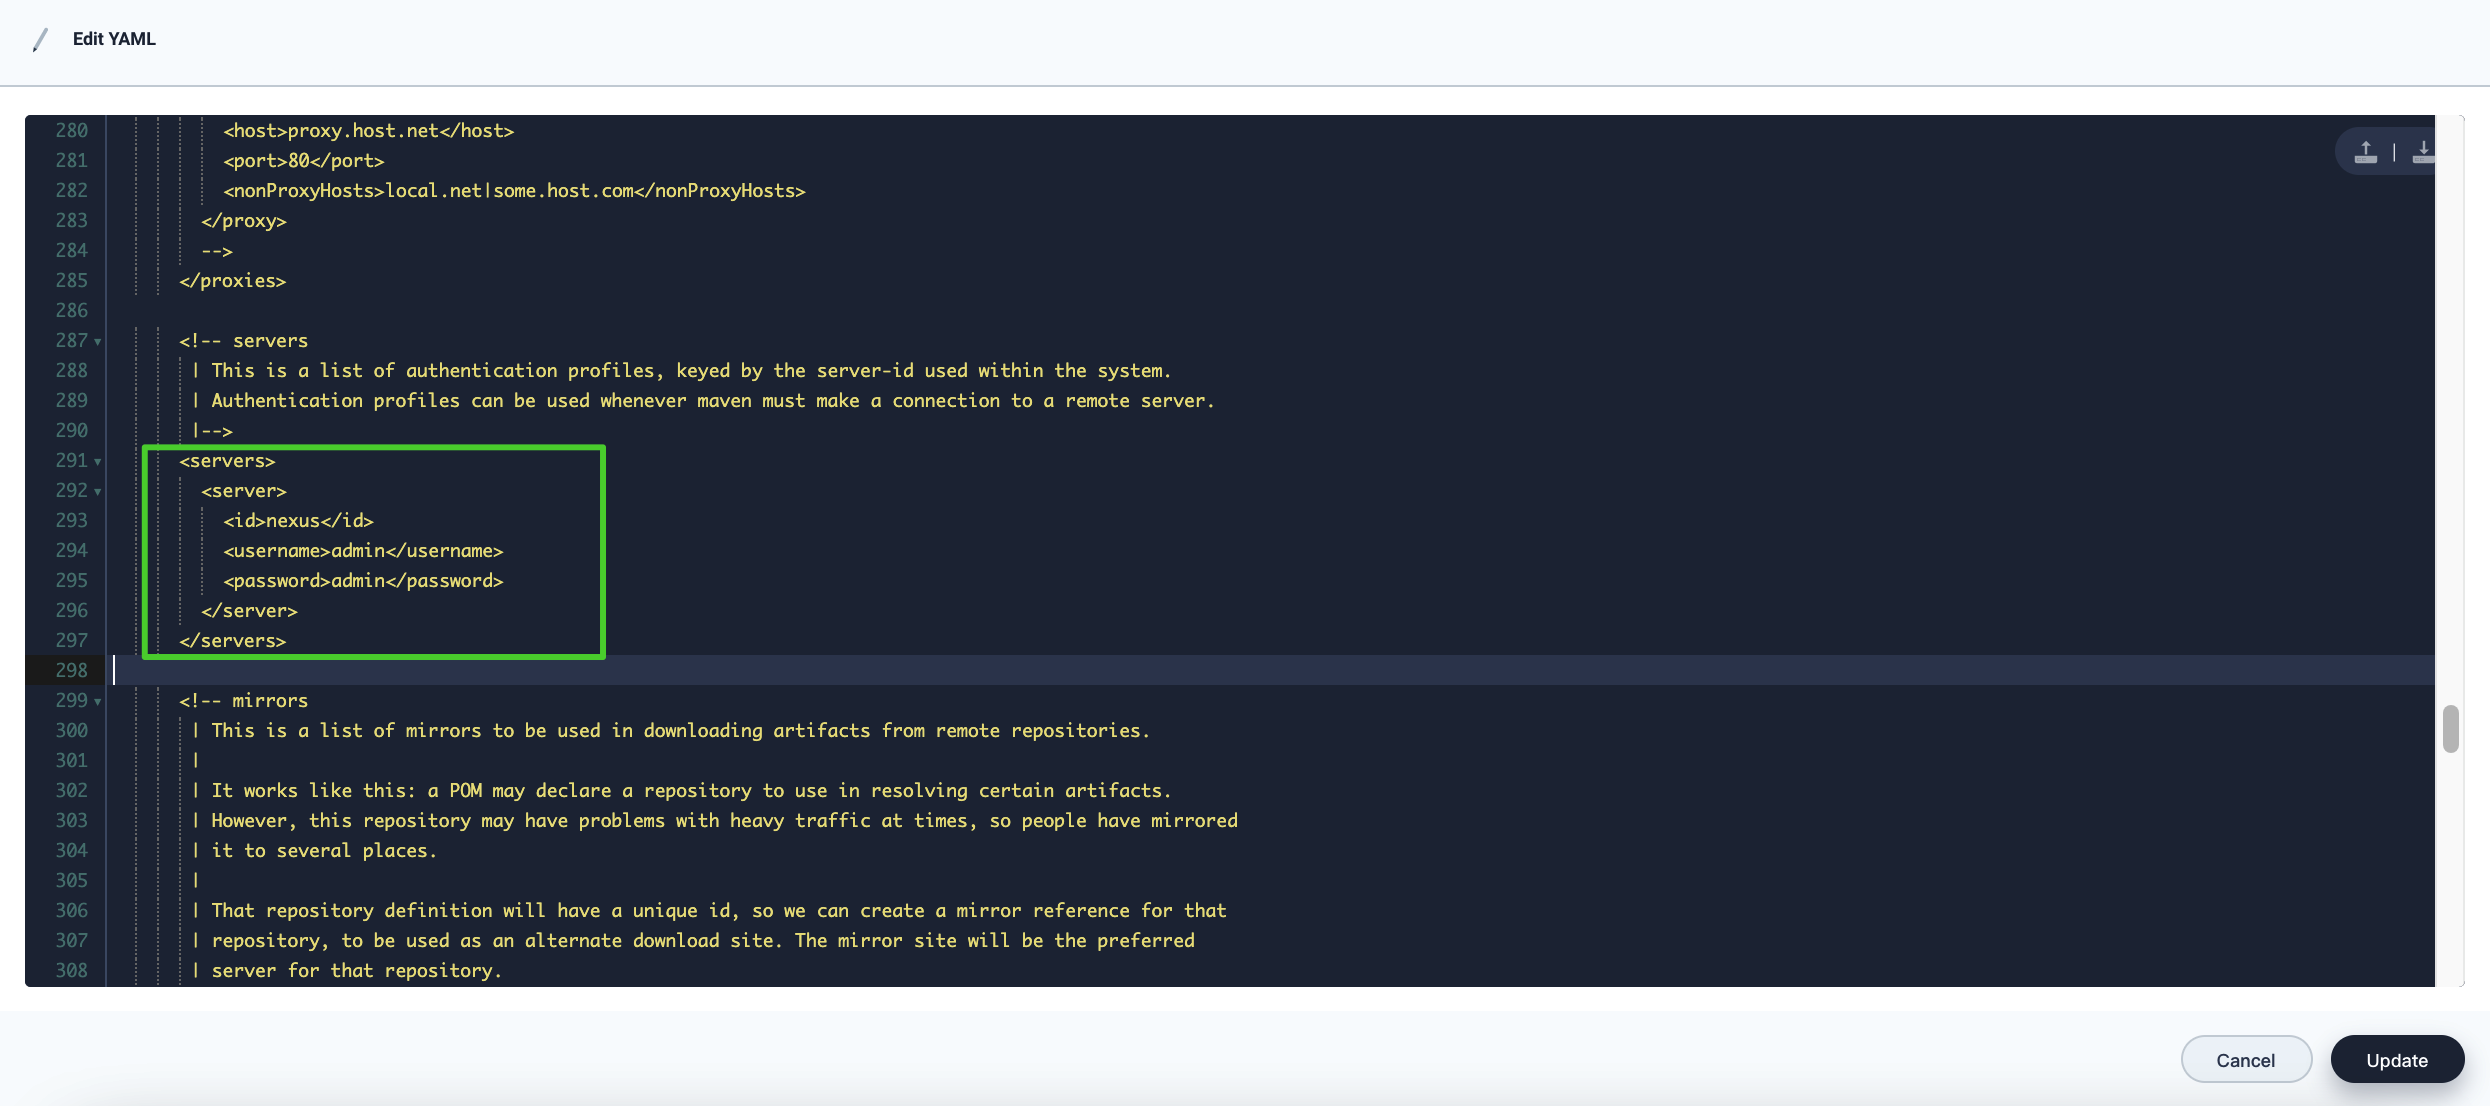
Note
<id>is the unique identifier you set for your Nexus in step 2.<username>is your Nexus username.<password>is your Nexus password. You can also configure aNuGet API Keyon Nexus and use it here for better security. -
Continue to find the code segment of
<mirrors>and enter the following code:<mirrors> <mirror> <id>nexus</id> <name>maven-public</name> <url>http://135.68.37.85:8081/repository/maven-public/</url> <mirrorOf>*</mirrorOf> </mirror> </mirrors>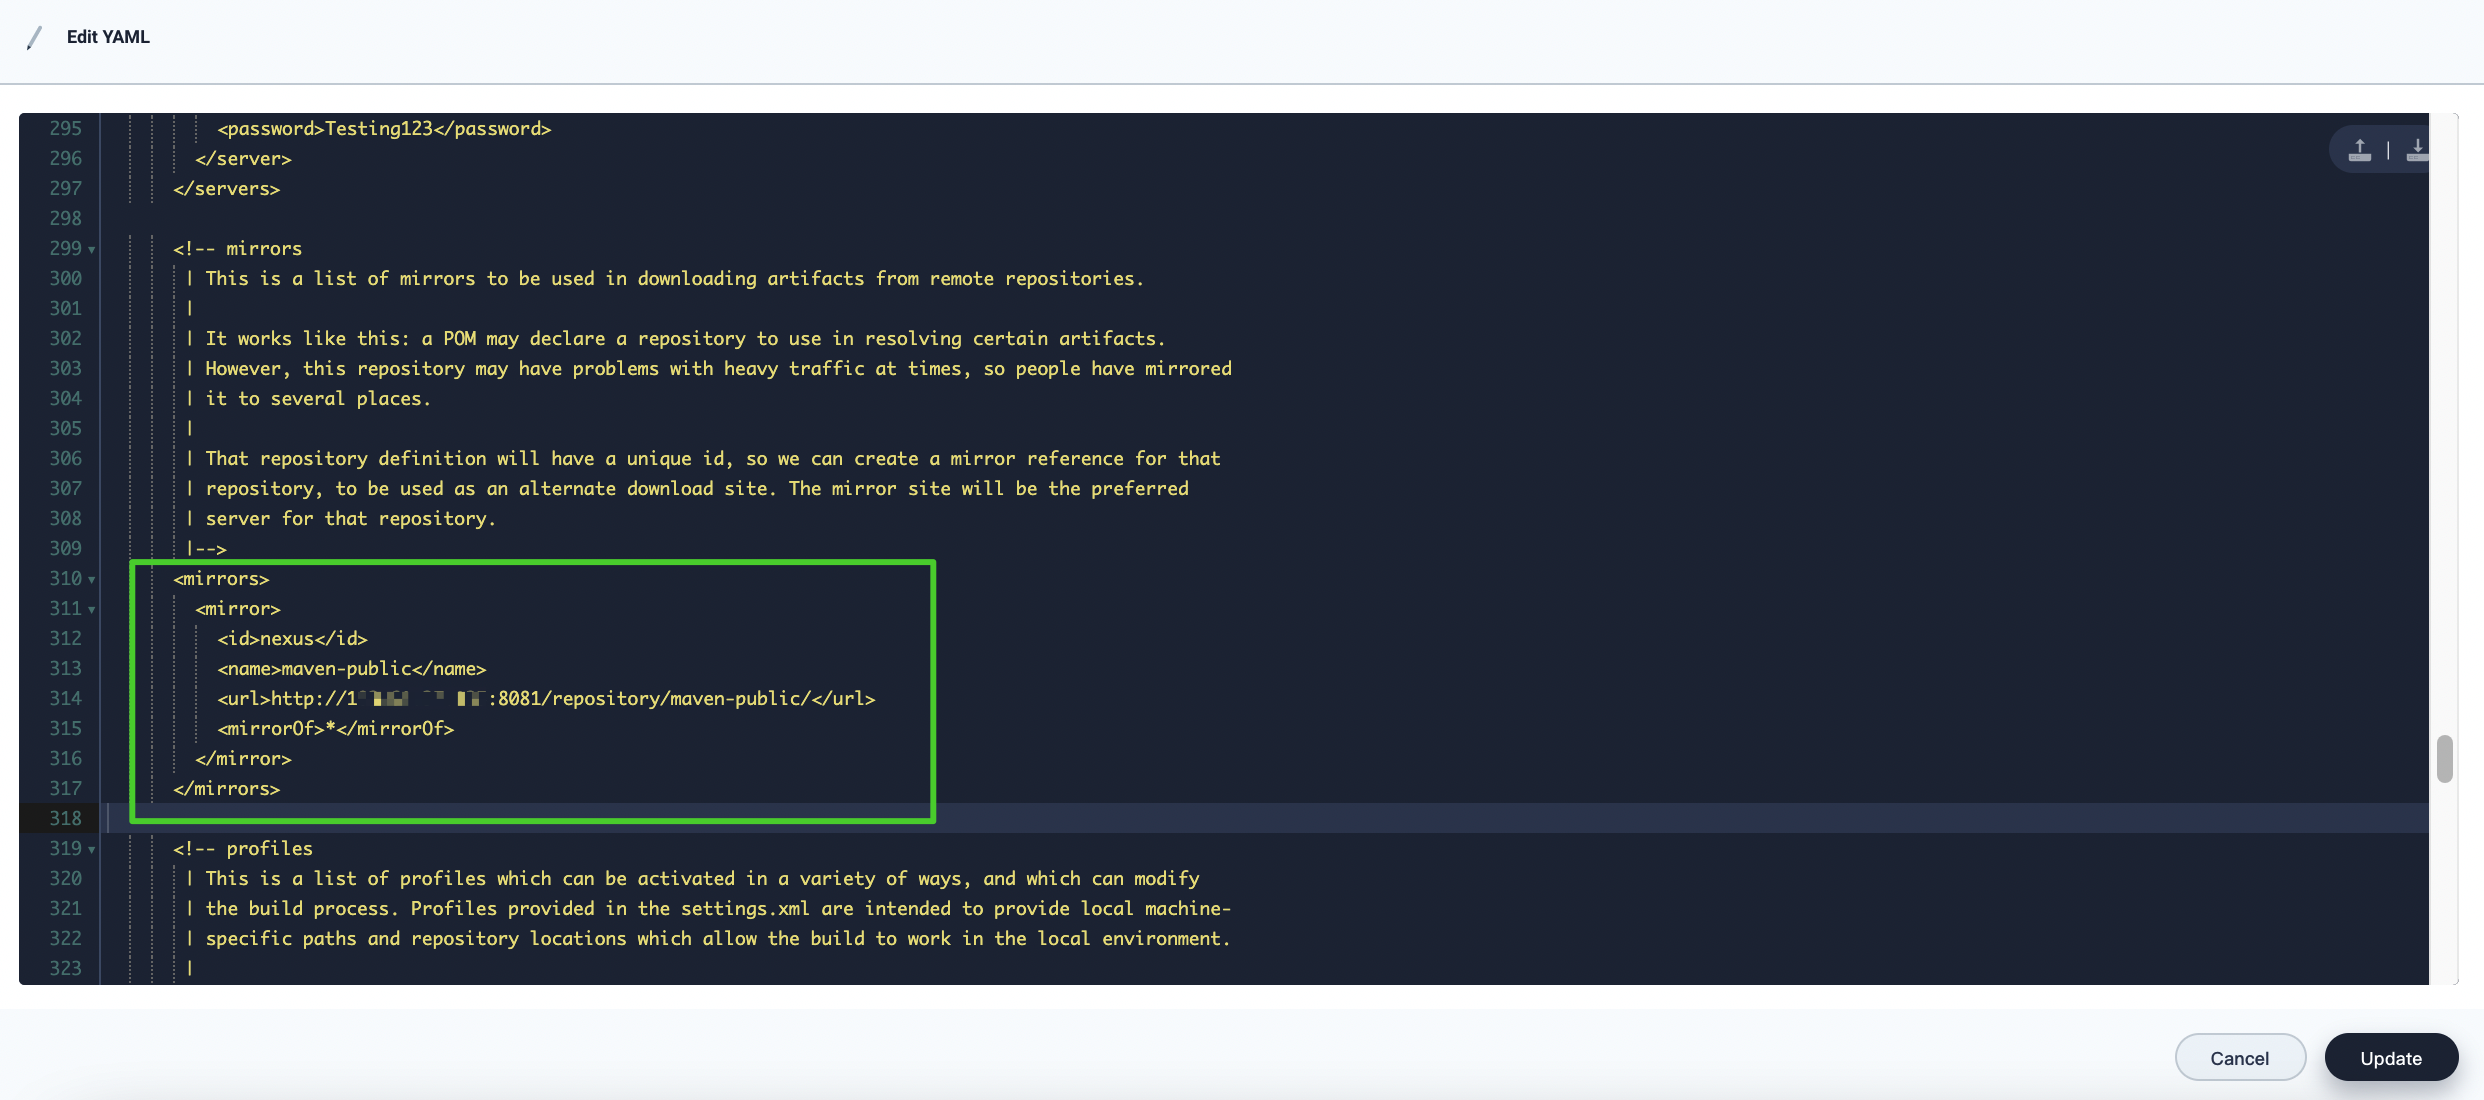
Note
<id>is the unique identifier you set for your Nexus in step 2.<name>is the Nexus repository name.<url>is the URL of your Nexus repository.<mirrorOf>is the Maven repository to be mirrored. In this tutorial, enter*to mirror all Maven repositories. For more information, refer to Using Mirrors for Repositories. -
When you finish, click OK.
Step 4: Create a pipeline
-
Log out of the KubeSphere web console and log back in as
project-regular. Go to your DevOps project and click Create on the Pipelines page. -
On the Basic Information tab, set a name for the pipeline (for example,
nexus-pipeline) and click Next. -
On the Advanced Settings tab, click Create to use the default settings.
-
Click the pipeline name to go to its details page and click Edit Jenkinsfile.
-
In the displayed dialog box, enter the Jenkinsfile as follows. When you finish, click OK.
pipeline {
    agent {
      node {
        label 'maven'
      }
    }
    stages {
        stage ('clone') {
            steps {
                git 'https://github.com/Felixnoo/learn-pipeline-java.git'
            }
        }

        stage ('build') {
            steps {
                container ('maven') {
                    sh 'mvn clean package'
                }
            }
        }

        stage ('deploy to Nexus') {
            steps {
                container ('maven') {
                    sh 'mvn deploy -DaltDeploymentRepository=nexus::default::http://135.68.37.85:8081/repository/maven-snapshots/'
                }
            }
        }
        stage ('upload') {
            steps {
                archiveArtifacts artifacts: 'target/*.jar', followSymlinks: false
            }
        }
    }
}
Note
You need to replace the GitHub repository address with your own. In the command from the step in the stagedeploy to Nexus,nexusis the name you set in<id>in the ConfigMap andhttp://135.68.37.85:8081/repository/maven-snapshots/is the URL of your Nexus repository.
Step 5: Run the pipeline and check results
-
You can see all the stages and steps shown on the graphical editing panels. Click Run to run the pipeline.
-
After a while, you can see the pipeline status shown as Successful. Click the Successful record to see its details.
-
You can click View Logs to view the detailed logs.
-
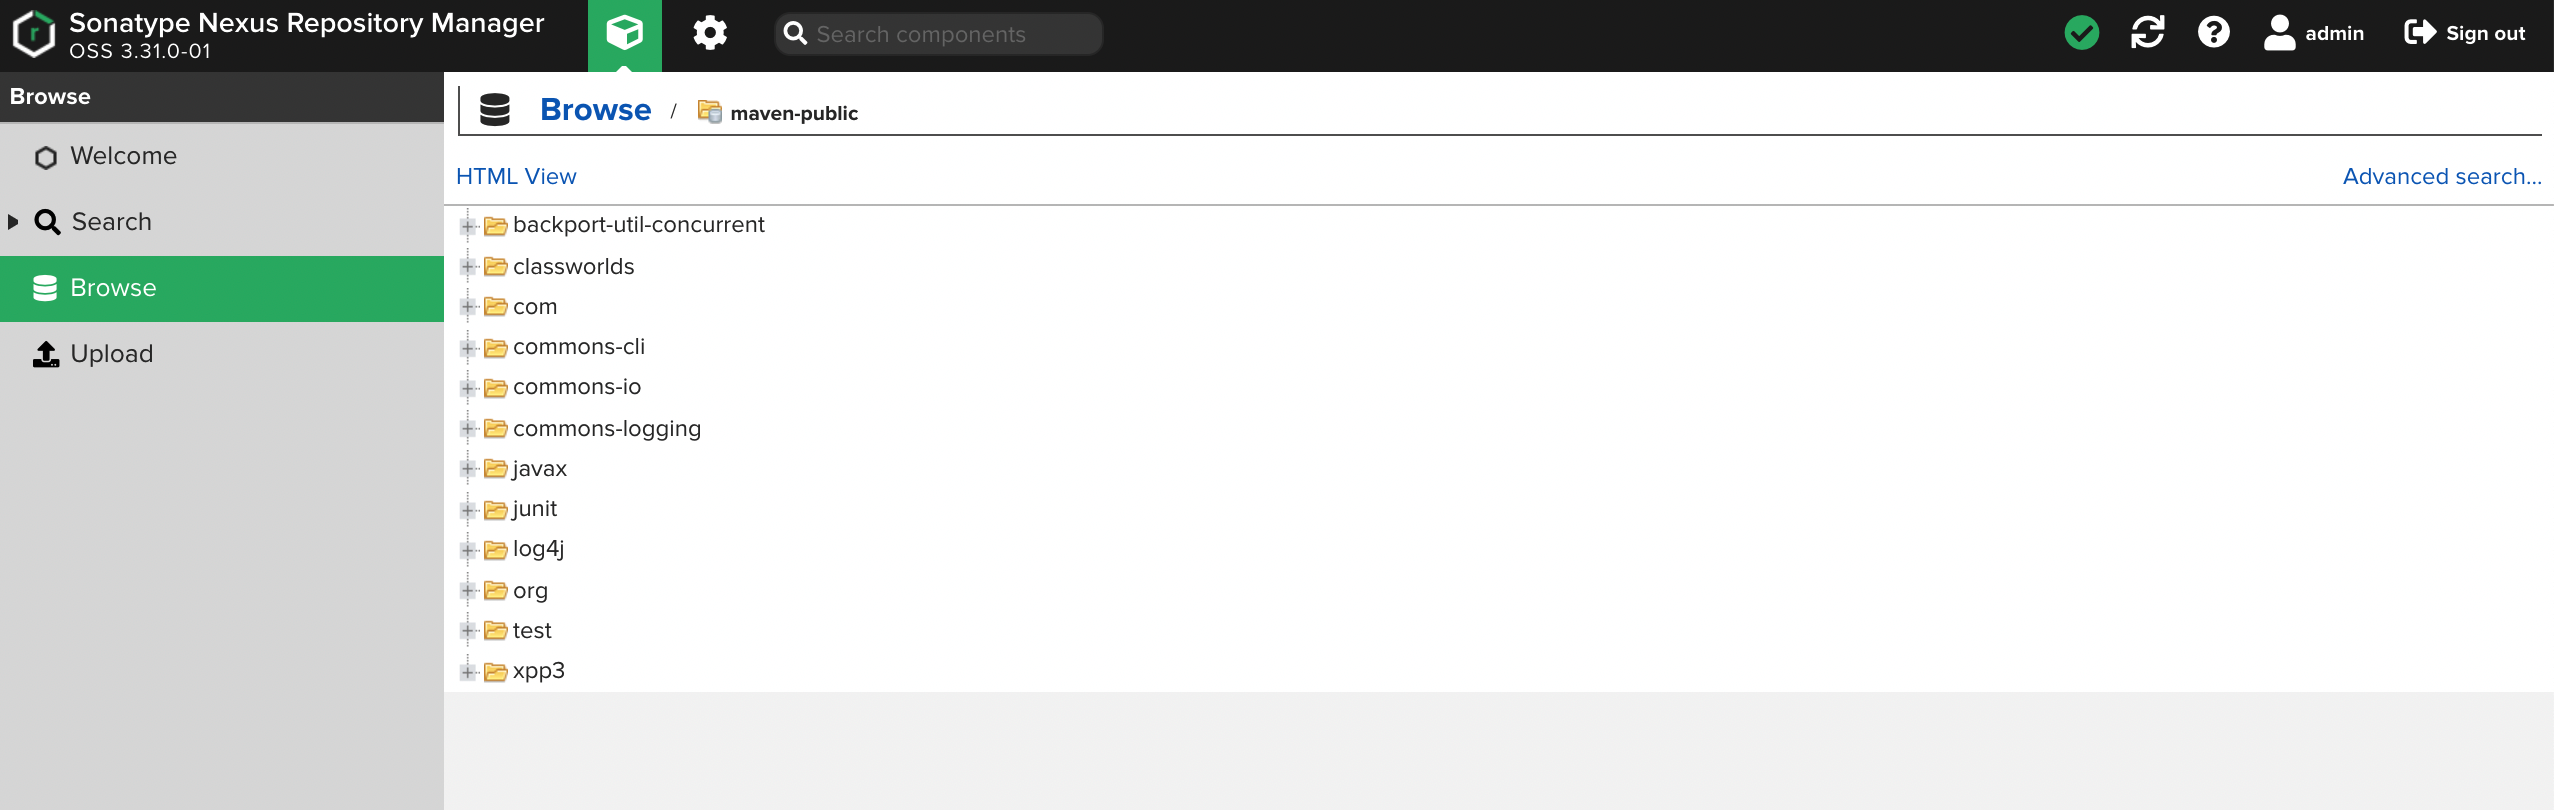
Log in to Nexus and click Browse. Click maven-public and you can see all the dependencies have been downloaded.
-
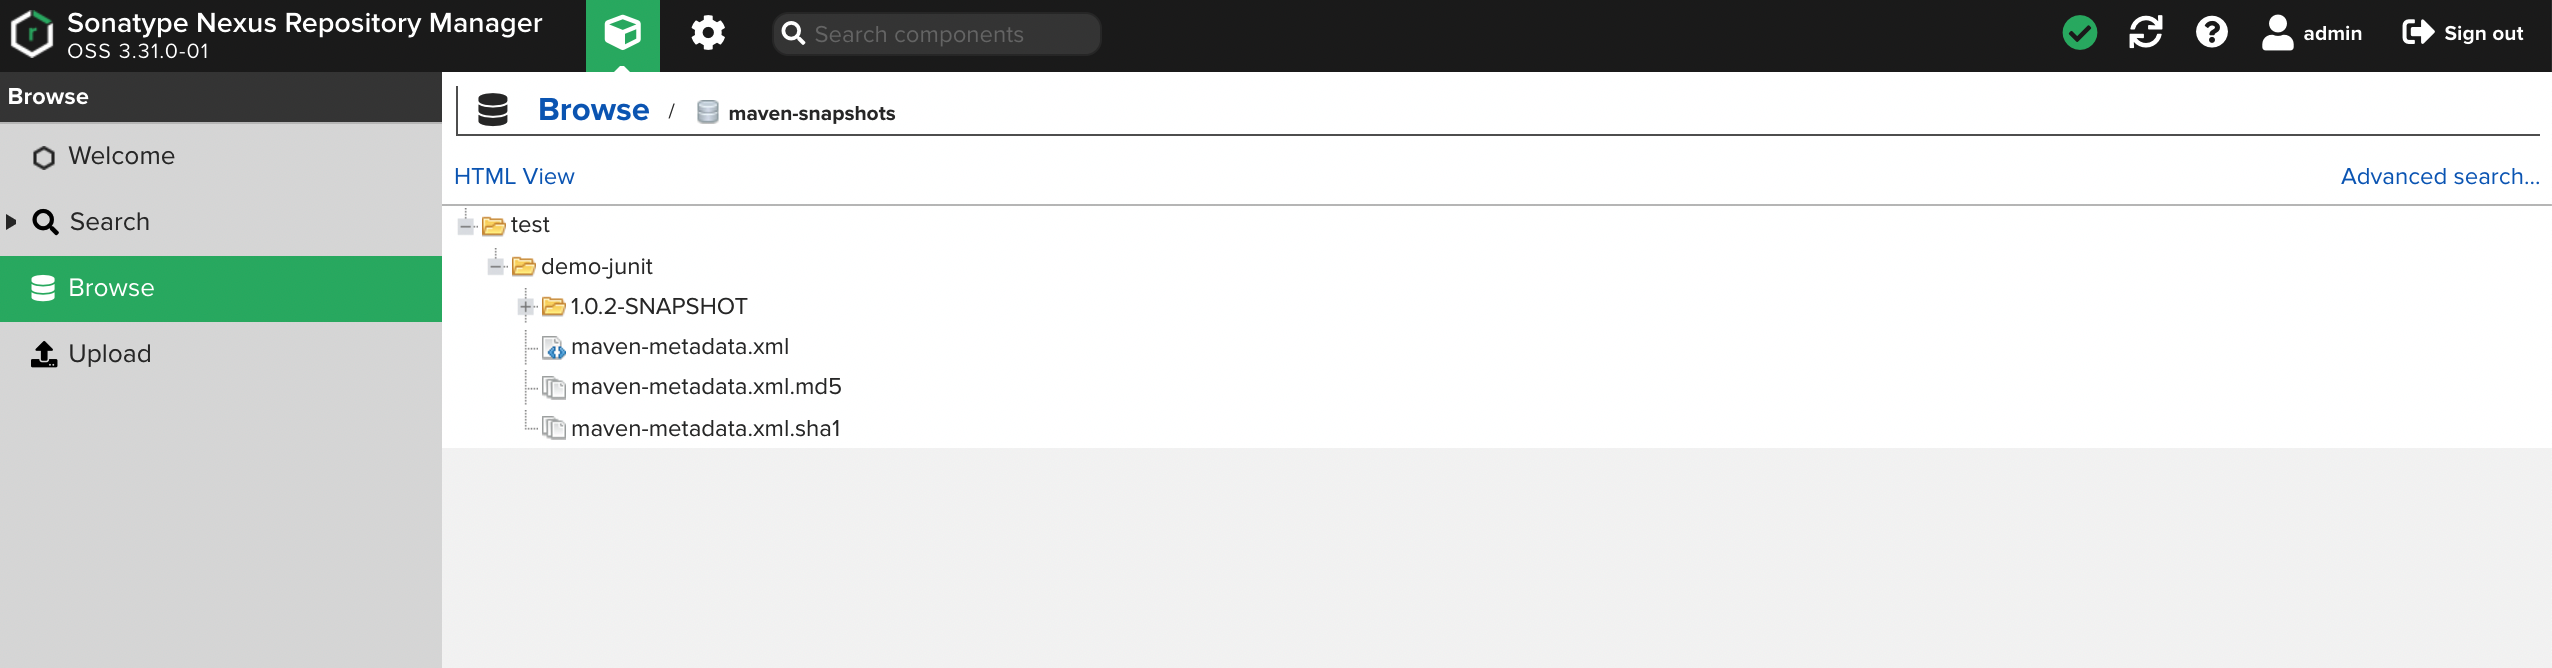
Go back to the Browse page and click maven-snapshots. You can see the JAR package has been uploaded to the repository.
Feedback
Was this page Helpful?
Receive the latest news, articles and updates from KubeSphere
 Previous

What’s on this Page